
 no reviews
Breadmaker purchasing advice: how to choose the right product
- What you need to know
- A breadmaker is a logical purchase for anyone who likes to make bread regularly.
- Thanks to their variety, breadmakers offer a wide choice for occasional bread bakers and passionate hobby bakers alike.
- These practical appliances can be used not only to bake bread, but also to make jam, yoghurt, or pizza dough.
- Breadmakers are a good and affordable alternative for allergy sufferers and people with intolerances.
Fresh home-made bread
Carefully selected ingredients and tasty toppings — if you want to decide for yourself what goes into your bread, you can bake it in your own breadmaker. The practical appliance delivers tasty, fresh bread quickly and easily, without requiring any special baking knowledge.
In use since the 1990s
The first breadmakers were developed in the 1990s. Since then, they have become increasingly popular and can be found in more and more households.
Different types of bread for every taste
Depending on personal taste, a breadmaker can be individually adapted to the needs of its owner. The machine offers different programs so that users can choose the optimal settings for different types of bread, such as toast, whole-grain bread, and sour dough bread. In addition, depending on the model, there are further programs that allow for very individual bread enjoyment: for example, for French bread, which provides a particularly crispy crust, or for sweet breads as well as gluten-free baking mixes. In appliances equipped with an ingredient dispenser, those who like to experiment can also add additives such as sultanas, olives, or spices to the bread.
Ready-made or mix it yourself?
Various baking mixes are available in the shops that make baking with the breadmaker even easier. The different ready-made mixes offer a good selection for every taste, so that a lot of variety is ensured when baking bread, be it mixes for rye bread, white bread, ciabatta, or protein bread. Baking mixes already contain all the ingredients in the right quantity. All you have to do is add water to the ingredients, which consist of flour, dry yeast, sugar, an acidifier, and preservatives.
Although ready-made baking mixes have proven their worth time and again, many hobby bakers still attach importance to a dough that they prepare themselves. Especially if they have allergies or intolerances, they can better control what ends up on their plate. Self-created bread mixtures are also good for experimenting with, so that everyone can create their own personal favorite bread in the breadmaker.
Dry yeast or fresh yeast?
Most bread recipes are designed for dry yeast. It has a longer shelf life, stores better, and is easier to use. If fresh yeast is used for baking bread, it must be dissolved in lukewarm liquid beforehand.
A breadmaker can do even more
Depending on the model, this useful appliance can also be used to make other dishes. Here, too, there are virtually no limits to your imagination and creativity. The options offered by a breadmaker in addition to baking bread depend on the model. The following additional programs are possible:
- Cake
- Pasta dough
- Pizza dough
- Jam and marmelade
- Yoghurt
- Rice and risotto
This makes the breadmaker a versatile appliance that relieves you of quite some work in the kitchen and saves a lot of time.
A machine for every bread lover
A breadmaker is a small, compact oven designed primarily for baking bread. As soon as the desired ingredients have been added and the baking program has been selected, it carries out all the steps independently. Depending on the model, the electric motor sets one or two dough hooks in motion, which knead the dough, while the heating element ensures the right temperature. An integrated mini-computer ensures the correct alternation between kneading, baking, and resting phases so that the dough can rise optimally and rest for the required time after baking.
As soon as the bread is baked, a signal sound is emitted. After the bread has cooled a little, it can be eaten. Depending on the model and the type of bread and program selected, two to three hours are required to prepare bread. Most entry-level appliances can bake bread weighing around 500g. However, there are also models available that can bake larger loaves of bread. Breadmakers that have two dough hooks and two baking tins can even bake two loaves at the same time.
The advantages and disadvantages of a breadmaker
A breadmaker delivers freshly baked bread at the desired time. The hobby bakers themselves decide which ingredients are used. This allows them to choose high-quality and healthy ingredients that are also in compliance with possible allergies and intolerances. The selection of recipes is extremely wide. Consumers can choose between ready-made baking mixtures and doughs they have made themselves. Many manufacturers even supply practical recipe books with their appliances, which provide a good basis for your own creations. Breadmakers are easy and intuitive to operate. In addition, bread preparation doesn’t usually require any special baking knowledge. Although bread can also be made in the oven, this consumes considerably more electricity than using a breadmaker.
Since breadmakers require a lot of space, they are less suitable for small kitchens. The baking process, which takes several hours, also demands a lot of patience from users. First until the bread has finished baking and then until it has cooled. For sudden bread cravings, or for entertaining unannounced guests, it is therefore more practical and quicker to go to the bakery. Breadmakers also don’t have a top heat. Unlike in the oven, the crust of the bread from the machine is usually less crispy.
Advantages
- Freshly baked bread according to personal preferences
- Choice of high-quality and healthy ingredients
- Large selection of recipes
- Own bread creations possible
- Easy to use
- No previous knowledge required
- Low power consumption
Disadvantages
- Requires a lot of space
- Bread baking takes several hours
- Less crispy crust due to lack of top heat
Breadmakers for occasional bakers and those who like to experiment
Breadmakers come in a variety of models. Although entry-level models don’t have as extensive a program selection as high-end appliances, they are available at a reasonable price and are a good choice for occasional bakers. With just a few program functions, you can easily make tasty breads yourself. Hobby bakers who want to supply a larger family with bread should pay special attention to the size of the breadmaker. Devices with only one dough hook can only bake a small loaf of bread and must therefore be operated several times before the whole family can eat bread. High-end appliances with two dough hooks and two baking tins are better suited to such needs.
The advantages and disadvantages of entry-level models:
Advantages
- Reasonable price
- Basic programs available
- Simple operation
- Suitable for occasional bakers
Disadvantages
- Limited program selection
- Only suitable for small loaves
If you expect more from your appliance and want to prepare jam or other dishes with it, you should go for a higher-priced appliance with additional functions. Although appliances with a wide range of programs are sometimes more complicated to operate than entry-level models, the enclosed operating instructions usually enable you to get started quickly.
The advantages and disadvantages of a high-end appliance:
Advantages
- Large program selection
- Larger bread quantities possible at once
- Suitable for frequent use and bakers who like to experiment
Disadvantages
- High price
- More complicated operation
What matters when purchasing
Before buying a breadmaker, prospective buyers should first clarify what they expect from the appliance. Occasional bakers need a different appliance than those who use the machine on a daily basis. Those who only need the breadmaker to bake bread don’t need an expensive high-end product with countless additional programs. Often, good entry-level models perform just as well for hobby bakers.
The right amount of dough
Beginner models can usually bake loaves of bread weighing about a pound (500g). If you have a larger requirement and don’t want to use the breadmaker several times in a row, you should choose a larger appliance. For this purpose, there are high-priced breadmakers with a bread size of up to 3 pounds (1,500g).
Useful scope of delivery
In addition to the appliance with one or two dough hooks, the standard scope of delivery of every breadmaker should include a baking tin and a measuring spoon or measuring cup. Higher-priced appliances have additional accessories, such as a dough scraper, to make it easier to remove the dough hook from the finished bread and thus avoid unsightly holes. An ingredient dispenser is also recommended for bread that is to be refined with nuts or sultanas, for example.
The program selection
For simple bread baking with standard recipes, an entry-level model with a manageable range of programs is sufficient. If you like to experiment and also want to use your breadmaker to make jam or yoghurt, you should pay attention to the available programs. Special ones are needed especially for baking gluten-free bread, as these flours have to be baked differently than flours with gluten.
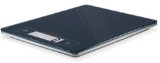
Additional functions
Many breadmakers have additional functions. An integrated scale, for example, is practical and makes weighing the required ingredients even easier. A power loss protection is also a useful function. In appliances with individual programs, the saved settings are retained even after a power failure and do not have to be reprogrammed.
Power consumption
In the long run, it is cheaper to bake bread yourself than to buy it at a bakery. However, users should always keep an eye on the power consumption of the breadmaker so that they don’t have to invest the money saved in increased electricity costs. Professional models, for example, have a higher output and therefore consume more electricity than entry-level models.
Control
If you want to keep an eye on your bread during the baking process, you should opt for a breadmaker with a viewing window. An interior lightning provides even more visual control. This means that hobby bakers don’t have to rely solely on the display information of the appliance, but can enjoy the sight of the delicious baked goods during the baking process.
Baking tin with non-stick coating
A stainless steel baking tin with a non-stick coating not only helps to release the bread from the tin without damaging it, but also makes cleaning easier.

Proper use and care
Before using the breadmaker for the first time, it should be cleaned properly. Production, storage, and transport may have left behind substances in the appliance that could pose a health risk. In order to enjoy a breadmaker for as long as possible, it is also important to pay attention to a few things when operating and caring for it. Users should pay particular attention to the dough hook and the baking tin. Cleaning them after each use ensures that no undesired deposits, unpleasant odors, or even bacteria form.
The dough hooks
For the breadmaker to work properly, the dough hook must always be easy to move. This can be ensured by greasing it with a little vegetable oil after each use. In this way, users prevent the hook from getting stuck and no longer turning. The oil is also very helpful for easy loosening of the bread after baking.
The baking tin
Although the non-stick coating of the baking tin makes cleaning easier, it is also very sensitive. Therefore, only clear water and a soft cloth should be used to clean the tin. Cleaning in the dishwasher is not recommended.
Caution: hot!
The breadmaker doesn’t radiate much heat from the outside. However, the baking process requires high temperatures. After baking, the inside of the appliance is therefore very hot. Users should open the breadmaker with care and only remove the baking tin with an oven mitt or glove.
Image 1: © sugar0607 / stock.adobe.com | Image 2: © Africa Studio / stock.adobe.com