


 no reviews
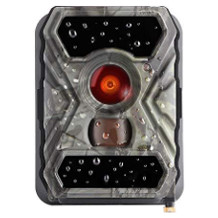
Wildlife camera purchasing advice: how to choose the right product
- What you need to know
- Wildlife cameras provide unique insights into the animal world that would otherwise probably remain hidden from people.
- The cameras are triggered by motion or heat sensors if an animal is in the vicinity.
- The devices differ in recording quality, range, triggering speed, and the ability to record in the dark.
- The data is usually stored on an SD card in the device.
- Modern variants send the images directly to the user via MMS, email, or an app.
What is a wildlife camera?
A wildlife camera, also called a trail camera or a hunting camera, is an outdoor camera equipped with sensors. It is triggered by movements in the frontal environment of the device as well as by temperature changes and is therefore also called a camera trap. The purpose of such a wildlife camera is the possibility to observe shy wild animals.
In today’s models, the images are no longer recorded on film but stored digitally on a storage medium. Digital technology makes it possible to take more pictures without users having to change the storage medium.
What can I use a wildlife camera for?
Regardless of whether you are an observer or a hunter: if you want to observe wild animals, you have to be on the lookout for a protected spot in a forest clearing. But beware: even small noises can frighten or warn the animal, so that it switches to caution or flight mode. Instead, a wildlife camera gives you the opportunity to get an authentic view of the animal activity without having to be there yourself.
Furthermore, wildlife cameras are suitable for property owners who want to protect their property. In this case, the devices serve as a deterrent. If this doesn’t work, you can at least document that strangers have entered the property. In the case of property damage, vandalism, burglary, or theft, the images can be used for prosecution and later as evidence in court.
Areas of application and examples
Photo traps are suitable for a whole range of observation and surveillance tasks.
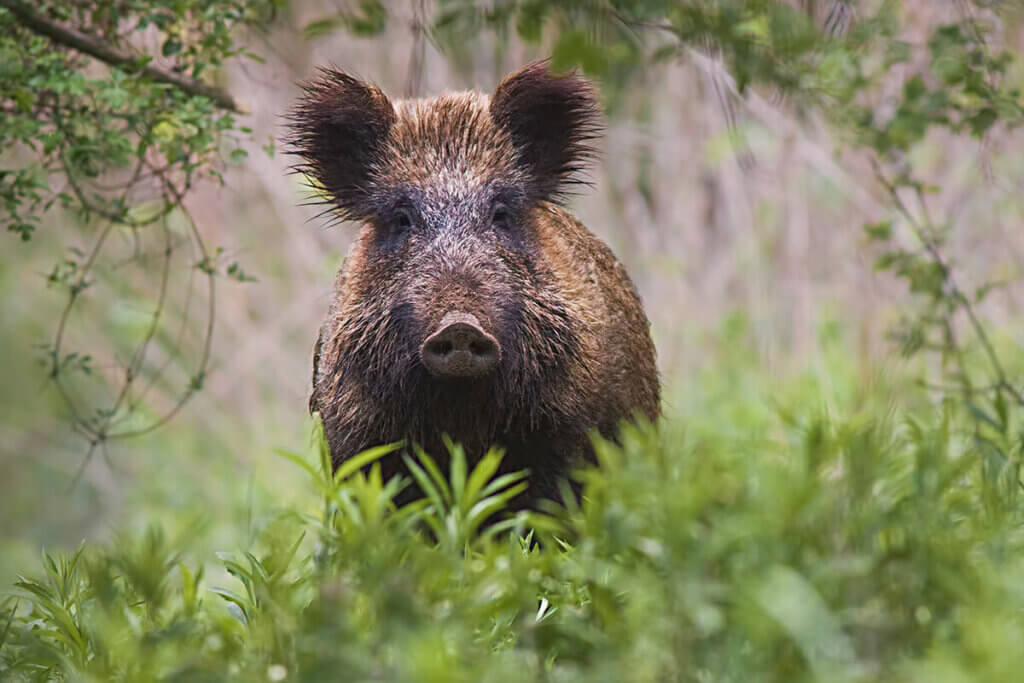
Wildlife observation: among other things, a wildlife camera is suitable for hunters who want to determine which animal species is responsible for the destruction of tree bark. Natural regeneration, i.e. randomly distributed seeds and their sprouts, is also often hindered by deer or boars who trample or eat them away. In the home garden, you can use a photo trap to determine which animals are nibbling at the lettuce heads, for example.
Illegal garbage dumping: if you have a remote property that is easily accessible by car, you may be familiar with the problem. Whether it’s laziness or stinginess, some ignorant people don’t dispose of green cuttings, building rubble, garden waste, car batteries, or used tyres properly at the recycling center, but pollute the environment by dumping them in the wild. If the contaminated sites are then on your property, you are in trouble. A report to the police usually comes to nothing without pictures of the perpetrators or car registration numbers.
Burglary: although a wildlife camera cannot ultimately prevent a burglary, if it is discovered by the thieves, it can at least be a deterrent. In the past, there have been cases where photo or video recordings even led to the identification of the perpetrators.
Vandalism: graffiti, arson, senseless crude destruction—all this is extremely annoying for property owners. Here, too, a wildlife camera can act as a deterrent on the one hand and help to solve the crime on the other.
Property surveillance: the devices are suitable, for example, for monitoring a garden shed, a garden pond, a beehive, a diesel tank, or stored firewood.
Basement and attic: do you hear noises in your house or flat from time to time that you cannot identify? Perhaps you have animal tenants such as martens or mice that seldom show their faces but unsettle you and keep you on your toes with their trampling noises or bite marks. These uninvited guests will not escape a photo trap.
Design and function
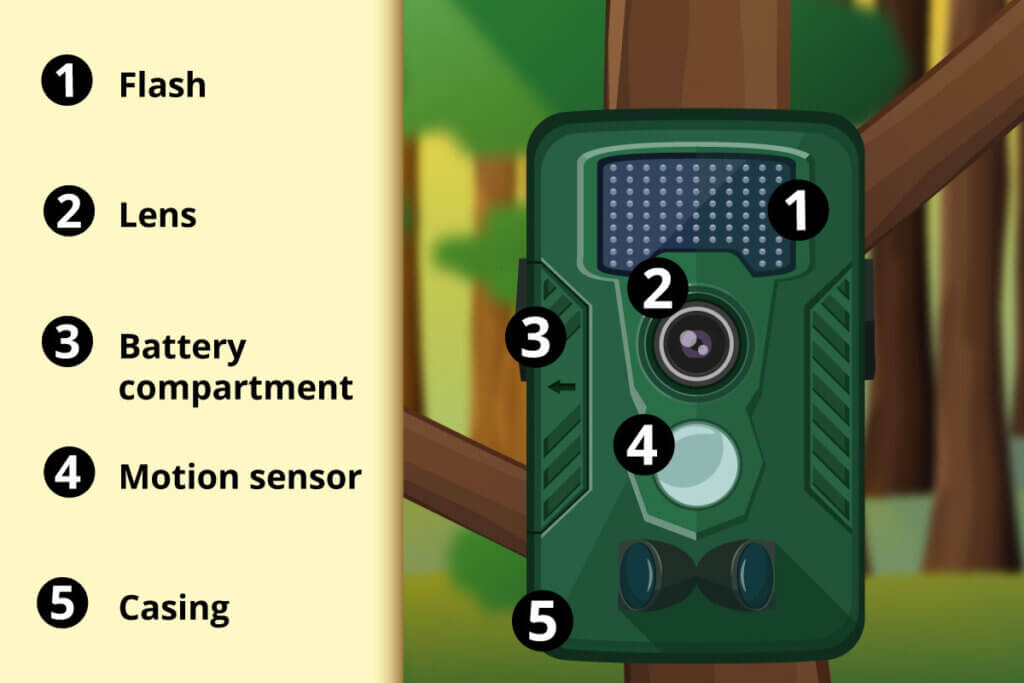
All wildlife cameras are similar in their five-part construction: the camouflaged casing that keeps all components safe from the weather and protects them from damage, a camera lens, an LED flash unit, a motion or heat sensor, and a battery compartment. The lens enables photo and video recording, while the LEDs ensure that recordings can also be made at night. The sensors ensure that a recording is triggered in the event of activities in front of it.
How is the wildlife camera triggered?
As soon as something moves in front of the camera lens, a motion sensor detects this and triggers a photo or video recording. Since the signal from the motion detector must first be passed on to the lens, the recording takes place with a certain time delay. This differs from model to model and should be taken into account when making a purchase decision. In addition to cameras with motion sensors, there are also cameras that trigger when a heat source is detected. So-called PIR sensors (passive infrared sensors) are used for this purpose. If the device detects a heat source within the functional area, it triggers a recording. The camera must not be mounted behind glass panes, as glass blocks a large part of the heat radiation. The sensor would then not be able to detect an object and accordingly not be able to trigger a recording.
The right lighting technology
It is essential to equip the camera with infrared LEDs. These enable night-time photography and at the same time are battery-saving to ensure long standby and recording times. You have to distinguish between two different LED technologies that provide the necessary brightness for the shots in the form of a flash: white-light LEDs (white LEDs), low glow LEDs, and no-glow LEDs (black LEDs).
The white-light variant is the cheapest, but it is not suitable for property surveillance because the brightness reveals the camera’s location to unauthorized persons. Low-glow LEDs expose outside the visible spectrum, but reveal their location through a faint reddish glow. Special black-light versions are more expensive to buy, but take usable pictures almost unnoticed even in the dark.
White LEDs: inexpensive, but recognizable
The white light flash is the classic variant that is also found in conventional cameras. White LEDs guarantee high image quality, even in complete darkness. Because the entire color spectrum is illuminated, sharp and even colorful images are possible in the dark. The flash lights up briefly and can scare away animals. Nevertheless, these less expensive devices are suitable for animal observation in the vast majority of cases.
For property surveillance, visibility is more important: the light is in the visible spectrum. It gives away the installation location and increases the probability of vandalism or theft. The white LED models can therefore only serve as a deterrent.
Advantages
- High image quality even in darkness
- High detail fidelity without noise
- Color images possible even at night
Disadvantages
- Visible flash can scare away animals
- Gives away the mounting location to people by flashing
- Only suitable to a certain extent for object protection
Low glow LEDs: infrared technology with a slightly reddish glow
Low glow LEDs operate in the infrared spectrum, approximately in the 850 nanometer range. Night shots are only possible in black-and-white mode with infrared exposure. Unlike white LEDs, these light sources don’t shine in the visible range. This allows the observation of shy forest creatures. However, a slightly reddish glow is perceptible during the exposure. Although few animals are bothered by this, the red glow can be detected by observant people. Once discovered, such models are also vulnerable to theft and vandalism.
Advantages
- Work outside the visible range
- Greater illumination than no glow LEDs
Disadvantages
- Reddish glow when triggered
- Only black-and-white images possible at night
No glow LEDs: more expensive to buy, but invisible
No glow LEDs, also called black LEDs, are a special infrared technology that works with a wavelength of 940 to 950 nanometres. The triggering is not perceptible to humans or animals. The range is about 20 percent less than that of an ordinary infrared flash. Photographs show a slight image noise; generally, only black-and-white images are possible at night. Models equipped with this technology are particularly suitable for observing shy game and for monitoring objects. Since they only glow very faintly, they are usually not noticed by animals or people: for this, unauthorized persons would have to know the exact mounting location and look into the camera head-on and from a very short distance.
Advantages
- Hardly perceptible by humans or animals
- Suitable for animal observation and object protection
- Lowest range of illumination
Disadvantages
- Only black and white images possible
- Pictures with slight image noise
What to consider when purchasing
Not only the flash type is relevant for your purchase decision, but also the sensor range, the shutter release delay, the power supply, the type of photo, and video recordings possible and the memory size.
Shooting angle of the lens
The larger the shooting angle of a camera, the larger the section of the environment it captures and the smaller the individual image objects. Depending on the lens, shooting angles of 52 to 120 degrees are possible.

52 degrees
A lens of this type captures a smaller area, but the objects are shown larger and therefore more detailed. Cameras with such lenses are particularly useful if you want to monitor a manageable area or a single object. If the objects are standing or moving at too short a distance from the lens, blurring can sometimes be the result. The models are ideal for a shooting range of 5 to 15 meters.

80 to 90 degrees
Lenses with an viewing angle of 80 to 90 degrees are suitable for a variety of purposes. They provide a good compromise between precise close-up and detailed long-distance shots. They allow you to cover objects close up in front of the camera as well as at the edge of a property within a range of 3 to 40 feet.

100 to 120 degrees
These special wide-angle lenses are suitable for covering a wide area as well as for monitoring narrow spaces. Because of the wide angle, distant objects appear smaller and even objects directly in front of the lens do not occupy the entire field of vision. The ideal field of view for these lenses is between 1.5 and 33 feet.
Image resolution
For most users, a comparatively low resolution of 3 to 5 megapixels is sufficient. Animals can be adequately recognized with this resolution. On the other hand, for surveillance tasks and identifying unauthorized persons or burglars, a higher resolution is more suitable. Some wildlife camera models therefore work with a resolution of 8 to 20 megapixels. However, a high resolution alone is no indication of lower image noise, as this phenomenon is influenced by the quality of the lens and the light sensitivity of the image sensor.
Video resolution
Almost all wildlife camera models allow the recording of short video sequences with a length between 5 and 60 seconds. Cheaper models work with a resolution of 1,280 x 720 pixels. Full HD cameras with a resolution of 1,920 x 1,080 pixels offer higher quality. Sound recording is usually optional. Often the cameras automatically take a snapshot before starting a video. But remember: a high resolution means more storage space is required.
Power supply
Wildlife cameras can be powered by a mains adapter or by a battery or accumulator. Especially for the latter models, a solar panel can be a useful addition to increase the runtime of the devices.

Mains adapter
The wired version, i.e. the operation of the wildlife camera via a mains adapter, is advantageous, as there is no need to replace batteries or recharge accumulators. While it is usually possible to use a nearby power socket for monitoring one’s own property or to bridge the way to the nearest power source with an extension cable, wired devices are virtually useless in the forest.

Batteries and accumulators
For remote places or objects, it is advisable to use a photo trap that does not require a permanent connection to the mains. Most models are designed for use in the wilderness and therefore use batteries or accumulators. You need to replace batteries after a certain period of use, which varies from device to device. However, many models can record for six to twelve months without changing batteries. Accumulators need to be recharged after this time.

Solar module
Models that have a rechargeable battery and an additional solar panel are particularly practical. During the day, the batteries charge in the sunshine, so that the energy from the storage unit can be used at night. This eliminates the need for regular manual recharging. However, during prolonged periods of bad weather, it may be necessary to charge the energy storage additionally.
Release time
The shutter release time, also known as the shutter lag, describes the amount of time that elapses before the picture is taken after the sensor has detected movement of an animal or person. Most devices work with a release time of 0.7 to 1.5 seconds, which is sufficient for many applications, such as observing bait sites or licking stones. However, if you want to observe game, a faster release time of 0.2 to 0.3 seconds is recommended, as otherwise it may have already disappeared from the picture.
Memory card
Wildlife cameras store the images digitally on an SD card. Some models come with an SD card. Depending on how many and what kind of shots you plan to take, it may make sense to buy a model with a large memory capacity. Some users are already well served with 4 to 8 gigabytes of storage space. However, since the prices for SD cards are continually falling, doubling the storage capacity often only costs a few dollars. Bear in mind that videos require significantly more storage space than photos. Some models advertise that they support SD cards with up to 32 gigabytes.
“Infinite” memory with loop mode
Some models are capable of loop recording: when the memory card is full, the oldest files are overwritten by new ones. This function ensures that new pictures can always be saved and that the memory card is never full. However, you should check the average amount of time that remains on the card before it is overwritten. Then, in an emergency, such as after an event like a burglary, you will have enough time to back up the data you need.
Other useful extras
There are a number of other functions that are not part of the essential standard repertoire of a wildlife camera, but which contribute to user-friendliness.
Sending files via integrated SIM card
Some models have a SIM card just like a smartphone. This makes it possible to send pictures and videos via the cellular network. The camera can be set so that the files are sent directly to the smartphone as an MMS, email, or push message via an app after the shutter is released.
The advantage: you do not have to be in the vicinity of the photo trap to view the pictures. In addition, you can intervene more quickly if something is wrong: it is, for instance, conceivable that the photo trap records an injured animal or an unauthorized person on the property.
With some models, you can choose whether the images should only be sent in this way or also stored on the memory card as a backup.
Sending files via Wi-Fi
In addition to models that use the mobile phone network, there are also models that have a Wi-Fi interface. However, you can only retrieve the data if the camera is used on your property for property surveillance: you need a Wi-Fi router with an Internet connection within direct radio range. These models are therefore not suitable for use in the forest.
Control via app
Some wildlife cameras that have a SIM card can be controlled remotely from smartphones or tablets via an app. In most cases, this gives you access to the files stored on the camera, allows you to take a snapshot, make settings regarding the fine adjustment of the shutter release or program a time-lapse recording.
Why time-lapse photography?
You can use the continuous shooting function to create a time-lapse animation. Some cameras can be programmed to take a single frame every 30 seconds or every 5 minutes, for example. Played back one after the other, a time-lapse video is created, which, for example, provides information about the change in vegetation over a certain period of time.
IP protection class
The various Ingress Protection Codes (IP Codes) indicate which mechanical influences an electronic device must withstand. Some manufacturers have the corresponding protection classes certified. For wildlife cameras, IP 66 is favorable. It identifies the models as dust-proof and protected against powerful jets of water, which, when used outdoors guarantees that the camera can withstand adverse weather conditions.
Legal framework and helpful tips
In addition to the question of which model is best suited for your specific purpose, you need to consider other aspects, for example the mounting location, camouflage, or the legal situation.
How do I mount a wildlife camera?
Many models come with a strap or belt. You use this to attach the camera to a suitable place such as a pole, a tree, or a shed. This saves you the trouble of drilling or hammering and at the same time protects the flora and fauna. Most models should be installed at a height of 4 to 5 feet. For other installation instructions, please refer to the user manual. If you want all-round surveillance, a combination of several cameras is a good idea. This way you cover every corner of an area to be monitored and have a back-up in case one of the devices should be exposed or taken out of operation.
How do I camouflage and hide a wildlife camera?
Most wildlife cameras are housed in a rugged and weatherproof case. This casing is usually discreetly dark or in camouflage colors, which saves you work and makes unwanted detection unlikely. A camouflage net can also help. Match the color of the casing to the background. If the camera is mounted on a brick wall, for example, a reddish-brown color scheme is a good idea. However, make absolutely sure that the lens, the LEDs, and the motion or heat sensors are not covered to ensure proper functioning. You should also not set up or mount the wildlife camera behind glass or window panes, as this can prevent the sensors from being triggered. In private households, it is recommended to place the wildlife camera inconspicuously on a full shelf or in the pot of a houseplant.
Am I allowed to use wildlife cameras in the forest?
Always check with local authorities before setting up a wildlife camera in public spaces. For example, a piece of forest may be in your private property, but it is still considered a public space in which third parties may not be photographed or filmed without their consent. The individual’s right to privacy often outweighs your right to observe your own woodland or hunting ground.
Can I use wildlife cameras on my private property?
You may use a wildlife camera as a surveillance camera on your own property. The property is only intended for a restricted group of people and may not be entered by unauthorized persons. Nevertheless, you may not publish any photo or video material created under any circumstances. Put up clearly legible signs indicating surveillance or inform guests and service providers about the measures. Recording of public paths or facilities is generally not permitted. The personal rights of passers-by can take priority over your need for protection. If in doubt, restrict the field of view by rotating the camera, installing protective screens in the field of view or masking off an area of the lens.
What are the most common malfunctions of a wildlife camera?
The most common malfunction is the unintentional recording of an image or video. For example, the devices sometimes tend to take pictures supposedly for no reason and fail when a recording would have been justified. This may be due to the angle: some models struggle to capture objects that are moving towards or away from them head-on. In some cases, the sensors are also to blame: they are either too sensitive or too insensitive. Cameras with heat sensors work particularly reliably when there is a high difference between the ambient temperature and the creature’s own temperature. Therefore, if there are problems in summer, it is advisable to increase the sensitivity of the sensors manually.
If you receive a “blank image”, this may be due to the following reasons:
- A small creature, for example a mouse, has scurried through the image.
- A fast creature such as a bird has moved through the frame that the camera could not capture due to the shutter lag.
- The camera is not fixed, it moves in the wind and triggers the shutter by its own movement.
- Blowing branches or objects heated by the sun have caused a shutter release.
You can solve these problems in just a few steps:
- Mount the camera as firmly as possible and not on easily moving objects.
- Remove objects from the field of view of the lens that the camera could mistake for living creatures.
- Lower the motion sensitivity of the sensor to capture only large animals.
If these tips are not successful, you can check the function of the camera step by step:
- Load the camera with new batteries or a fully charged accumulators.
- Make sure that there is enough memory on the SD card.
- Position the camera so that it is protected from the wind and at a height of 4 to 5 feet.
- Adjust the sensitivity of the sensors if necessary.
- Test the lateral motion detection by stepping through the image section.
- Test the frontal detection by slowly approaching the unit from the front.
Image 1: © WildMedia / stock.adock.com | Images 2-10: © FinalCheck