
 no reviews
Photo scanner purchasing advice: how to choose the right product
- The most important facts in brief
- Depending on the model, you can use a photo scanner to digitise slides, negatives, developed photos or printed snapshots.
- Some models are limited to certain photo formats, others handle many of the common formats.
- They can be divided into flatbed scanners, auto-feed photo scanners, slide and negative scanners, lamp scanners and devices for taking photographs.
- Many photo scanners come with software that can be used to remove unwanted effects such as image noise or red eyes.
- To ensure that the digitised images are safe, it is advisable to regularly transfer them to an external storage medium or to a cloud storage service.
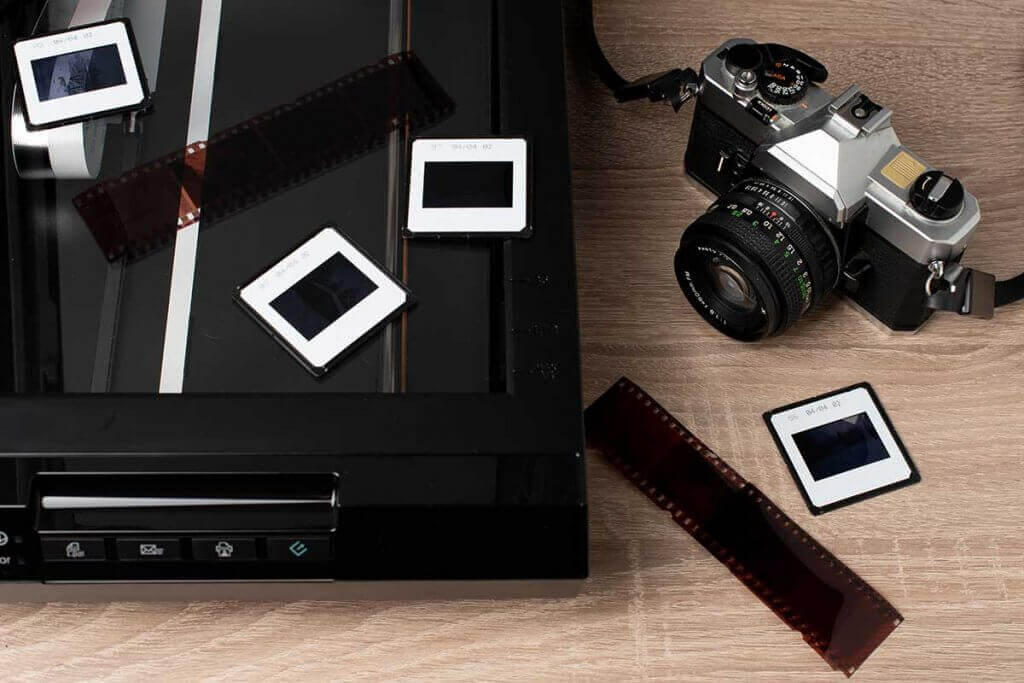
From analogue to digital photography
Digital photography has long been the norm today. While adults may still remember holidays with the analogue film camera, with whose films either 12, 24 or 36 photos were possible, they already snapped with the digital compact or SLR camera on later excursions. In the meantime, many smartphone cameras have such a good quality that they are not only used for snapshots, but also for professional shots. Almost unlimited shots are possible as long as there is enough memory space.
But what about the slides from the African safari, the analogue recordings of your own wedding or the film negatives of a family celebration long ago? All these beautiful memories have one disadvantage: they age. Both the material of film negatives and slides as well as developed photos, so-called positives, are sensitive to light and heat. The older the photos are, the bigger the problem: gradually the colours fade and the photo becomes blurrier.

With a photo scanner, you have the opportunity to save these precious memories from fading, yellowing and decomposition. Once scanned, the digitised photos are safe from age-related variations in quality. What’s more, you can keep the images on your hard drive sorted by subject, easily send them online to family and friends, or present them via a projector at the next family gathering. Read our guide on how to plan and carry out digitisation.
What is a photo scanner?
A photo scanner or photo digitizer is an electrical device that uses an optical sensor to create digital images of inserted photos. The whole thing can be thought of as a classic scanner used to digitise invoices or certificates. However, the technical equipment is usually different. The optical sensors of many photo scanners have a higher resolution in order to be able to read the images as sharply as possible and display them on the computer.
Software often enables several digital copies of negatives or slides to be made in one step with one scan, or several photos to be pulled from a stack one after the other and digitised via a feeder. In addition, subsequent image processing is usually possible. With other models, users scan either exclusively or additionally film negatives and slide positives.
If negatives or slides are to be digitised, a transillumination unit is required, unlike for scanning positives: Because the incident light of the scanner is not sufficient to provide the brightness required for the sensors, the image negatives must be transilluminated. The scanner itself processes the physically present negatives or positives into digital image information. The image is illuminated and the reflected light is transmitted pixel by pixel to a digital sensor. Depending on the model, either the sensor or the object to be digitised is moved during this scanning process.
Type of scannable media
Depending on the type of scanner, it is possible to digitise different types of photo media. Classically, all scanners can scan and digitise developed photos, i.e. positives, as well as printed photos on paper. How easy the process is and how high-quality the results are depends on the model.
It is more difficult with negatives and slides, where the incident light, which is sufficient for scanning certificates and other paper-based documents, is not sufficient. For these cropped film snippets with or without frames, the scanner needs a so-called transillumination unit to cast the image onto a carrier medium by means of light and to read in the projected image. So if you have an extensive photo archive with different types of media, you should look for a universal model that can digitise the desired types of images.
Different types of photo scanners
There is a wide variety of photo scanner models. There are special models that are limited to scanning one type of media, as well as universal models. Choose your photo scanner based on which photos you mainly want to save, and make sure the model can scan the appropriate media. If you only have a few media of one type, it makes sense to decide against a universal model and have the manageable number of photos professionally digitised.
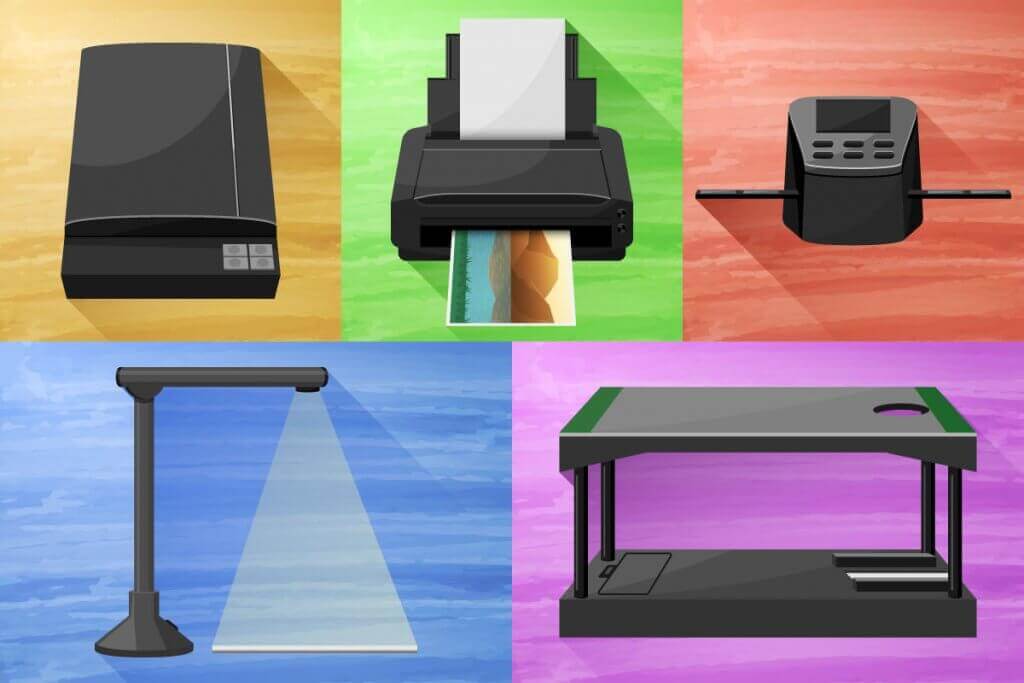
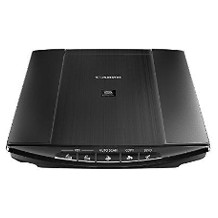
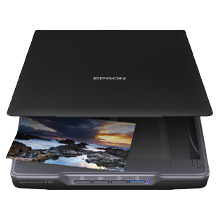
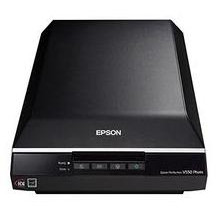
Flatbed scanners
Flatbed scanners are classic flatbed scanners that can also be used to digitise documents and photo positives. Models that are especially suitable for digitising photos, including slides and negatives, also have a transillumination unit in the lid.
Furthermore, flatbed photo scanners usually come with frames into which slides and negatives can be inserted. During the actual scanning process, software recognises the individual negatives and crops the results accordingly. In this way, several photos can be digitised in one step, which is a great relief in what is already a very time-consuming but worthwhile job. For example, you can scan four or eight slides or two negative strips simultaneously.
Reading in positives works in the same way as with ordinary scanners: the prints are placed on the scanner glass with the subject side down. With some models it is also possible to scan several positives in one step.
Pro points
- Besides photos, documents of any kind can also be digitised
- Slides and negatives can be scanned
- Processing of several media at the same time thanks to frames
Drawbacks
- Time-consuming refilling of frames necessary
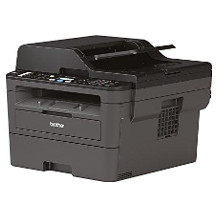
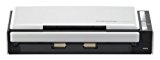
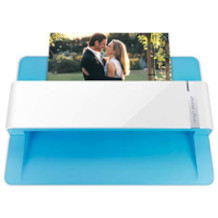
Photo scanner with automatic feeder
This type of photo scanner is a device that has a feeder for photo positives. In an office context, such a feeder is used to load a stack of paper and feed it one by one. In this way, for example, an entire file can be copied without having to feed in the individual sheets one after the other. The principle is very similar for a photo scanner with a feeder: you insert a stack of photos. The device then feeds the photos one after the other and saves each of them in a separate file on the hard disk.
This procedure is comparatively convenient because you do not have to enter the photos individually or remove them from the scanning glass. The actual scanning process also starts automatically. In this way, even larger quantities of prints or printed photos can be processed quickly.
The feed works best when you use prints of the same format. Then the risk of a photo being fed in incorrectly or bent is comparatively low. Many of these feeder scanners can be adjusted to the format of the prints, for example by manually widening or narrowing the feed slot.
Pro points
- Positive formats can be scanned automatically in batches
- Scanning of different formats possible
- Fast and less tedious digitising
Drawbacks
- No processing of negative formats or slides possible
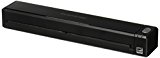
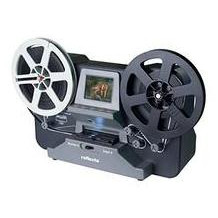
Slide and negative scanners
Among the photo scanners there are also devices that can scan and digitally store slides and negatives either exclusively or among other things. To do this, users place the negative media in a frame and slide it into the device, where they are scanned. To do this, users must manually slide the frame with the individual negatives through the device to the correct position.
Some models also have an automatic feeder that pulls the individual photographs in front of the transillumination unit. The principle can be imagined as with the old-fashioned slide projectors, where the next shot was pulled out of the cassette and fed in front of the exposure unit at the push of a button.
Pro points
- Simple feeding of slide positives or negative image strips
- Partly suitable for scanning larger quantities
Drawbacks
- No digitising of positives possible
Special solutions Lamp scanner and smartphone holder
It may not be immediately obvious that the following two types of scanners can also be used to digitise photos. Lamp scanners are mainly used for digitising documents and books. Smartphone holders are low-budget solutions for photographing slides and negatives using the smartphone camera.
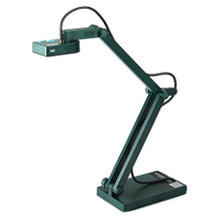
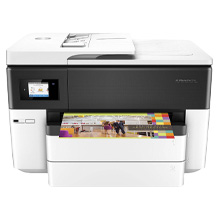
Lamp scanner
At first glance, this type of scanner could be mistaken for a desk lamp: Document scanners or lamp scanners actually bear a certain resemblance to workplace lighting. They are used in libraries, among other places, to digitise books.
The principle is relatively simple: you simply place the object to be scanned in the designated area and trigger the overhead capture either via a button on the device itself or via software on the PC.
A disadvantage is the large distance between the lens and the medium, which means that lighting conditions can have a serious effect on the scanning result. In addition, the lenses often deliver a comparatively low resolution, so that the results fall short of expectations. The biggest shortcoming of lamp scanners: as there is no fluoroscopy during the scanning process, it is not possible to digitise slides and negatives. They can only process developed and printed photos.
Pro points
- Simple scanning by placing in marked zone
- Partly suitable for scanning larger quantities
Drawbacks
- Sensitive to dirt and light
- Scanning of negatives and slides not possible
- Often low quality of scan results
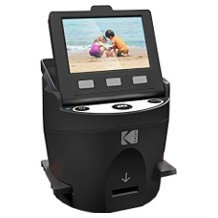
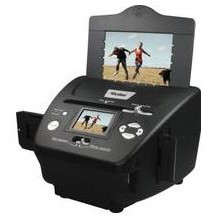
Smartphone plus holder as scanner
A relatively simple solution for digitising slides and negatives is offered by special slide scanning devices for the smartphone. Users place a single slide in a corresponding frame, which is battery-operated and illuminated from the underside. A few centimetres above the frame is a surface with an outlet. They position their smartphone on it so that the lens has a clear view of the illuminated slide.
The photos are thus taken with the smartphone’s camera. The quality of the photographs thus depends directly on the smartphone camera. The arrangement of the camera lens on the back of the housing can also become a problem, as manufacturers arrange them in different places so that the person taking the photo potentially does not have a clear view of the subject through the lens. In addition, reflections are possible when taking pictures and the digitisation of larger quantities of slides is very tedious: each motif must be inserted individually.
Pro points
- Very cheap
Drawbacks
- No digitising of positives
- Manual change of slides or shifting of film strip
- Reflections possible
- Quality of scans depends on smartphone
Supported photo formats
Before buying a photo scanner, you should ask yourself what formats your negatives and positives have. Then you can decide on a suitable model.
For negatives, for example, the most common format is 2:3, for slides it is the 35mm format. This produces prints of approximately 10 x 15, where the first digit indicates the height of a photo in centimetres. With modern digital cameras, the 3:4 format is predominant, resulting in prints of sizes 9 x 11 or 10 x 13, for example. In addition, there are digital cameras and smartphones that take photos with the 9:16 format. Prints of these snapshots may have been made in the sizes 9 x 15 or 10 x 18, among others.

If you have self-printed images, the photo scanner should also be able to process A4-size prints. Feeds must be suitable for the desired format or be adjustable. Frames in which negatives or slides are inserted must fit the format to be scanned. Oversized or undersized media cannot be processed.
Other buying criteria
When looking for a suitable photo scanner, it all depends on the individual wishes and needs of the prospective buyer. Models differ mainly in terms of scanning quality, ease of use and scanning speed. Among other things, the type of automatic feeder, the maximum number of media that fit into a magazine and the speed at which the media can be digitised can be decisive factors.
Number of media in the feeder
Some photo digitizers have an automatic media feeder. This may be a tray into which you insert a stack of photos. These are fed in one at a time, automatically past the scanning unit and digitised. This takes a lot of work off your hands because, unlike a flatbed scanner, you don’t have to place each photo individually on the scanning glass.
For slides, there is a system that is reminiscent of the outdated cassettes of slide projectors: here, the slides that are stuck in the magazine are gradually fed in and digitised. The more media the feeder can hold at the same time, the less often you have to refill it and the more comfortable and faster the scanning process is.

Scanning speed
Scanning speed is a key factor in determining how long it will take you to digitise your photo collection. This can make a difference especially for large projects, for example if you plan to transform the entire photo collection from the attic into the digital age. However, a faster processing speed can have a negative impact on the quality of the scans due to a lower resolution.
Resolution
The resolution of scans is expressed in dots per inch (dpi) and tells you how many dots per inch of an image can be scanned. The higher this value, the higher the quality of the scan. However, as the quality increases, so does the file size. If you double the resolution of the scan, the storage space required quadruples.

For private use, a model with a resolution of 4,800 dpi is usually sufficient. To protect negatives and positives from weathering, they do not necessarily have to be processed in the highest quality. Only if you plan to have the photos developed later, for example in poster size, is it worth choosing a higher dpi level.
For positives, a scan with a resolution of 300 to 600 dpi is usually sufficient. Negatives and slides, on the other hand, require a somewhat more detailed resolution, i.e. 1,200 to 4,800 dpi, as more information is available on a smaller area and the transmitted light process requires a higher level of detail.
Colour depth
The colour depth reveals the maximum number of different colour values an image can contain. In the professional sector, a colour depth of 48 bits is used. For private use, a 24-bit colour depth is sufficient in most cases. Commercially available monitors and printers cannot display more than about 16.8 million colours.
Data transmission
The most common method of transferring scans to a computer is probably familiar to you from a standard printer: the photo scanner is connected via USB cable, whereupon the scanning process is either started by pressing a button on the device itself or triggered via the software on the PC. The scans are transferred by cable and stored on the computer. A few photo scanners allow the more modern integration into the WLAN home network. This means that there is no need for cabling between the computer and the scanner. The advantage: several computers can communicate with the scanner regardless of their location in the home.
Another variant are stand-alone devices that you do not connect to the computer. Instead, the scans are stored on a memory card, usually an SD card. You can then read this SD card on the computer. It is also possible to scan photos without a computer being available.

Display
LC displays directly on the photo scanner allow a first impression of the quality of the digitised image. These displays are especially common with stand-alone devices.
Weight and size
Weight is usually not a major factor when deciding on a photo scanner: usually the devices are not intended for mobile use, but for stationary use, for example on a desk. However, size can be a decisive factor if there is not much space available. Flatbed scanners and models with side feed of slide and negative frames take up the most space. These models sometimes reach dimensions of 55 x 30 x 20 centimetres. Compact models with a top feed for positives are considerably smaller. Compact models sometimes measure 12 x 10 x 10 centimetres.
Software
If you have set yourself the goal of digitising the photo collection from the attic, you are often faced with a mammoth task: pre-sorting the photos and the scanning process itself takes a lot of time. Therefore, photo scanner software should be as intuitive to use as possible. Ideally, settings should be varied but uncomplicated, and buttons for the next scan should be available at the click of a button.
Once the scan of the photos is complete, many users want the option of post-processing, such as cropping, rotation in case of skew, removal of red-eye, image noise, dust and scratches: anything that has not yet been automatically corrected during the scan should be able to be touched up with the software.
With stand-alone devices, no software is needed for the scanning process itself. Any potential post-processing takes place later on the computer.
How should I back up the digitised photos?
Once you have successfully digitised an album or box of old photographs, most of the work is done. But be careful: both hard drives and SSD memory age: the risk of defects increases with time and the number of write operations. Mechanical influences, such as dropping the hard drive or laptop, as well as damage from fire and water, but also the simple loss or theft of the storage medium can ruin hours of work or, in the worst case, irretrievably destroy the captured memories.
For these reasons, it is highly recommended that you regularly back up your data to an external storage medium such as a USB stick or an external hard drive. Should you now lose the media on a storage medium, you can fall back on the backup copy.
Since the factors mentioned, such as theft and water and fire damage, can destroy several media in a household, it is a good idea to keep a copy of the data elsewhere, for example with relatives or friends.
Since the last few years, cloud storage services have established themselves as an alternative to backing up to external storage media: Many providers enable the automatic synchronisation of photos. For a small monthly fee, the photos are stored in the provider’s server centre. These are usually redundantly protected against file loss. Small amounts of data can sometimes even be backed up free of charge. Another advantage: you can share the digitised photos with family and friends easily and regardless of location.

Users who fear for the security of their private recordings can encrypt the data with a service such as Boxcryptor. In this case, the photos are safe from the provider’s eyes as well as from unauthorised third parties. The service is free of charge for private users.