

 no reviews
Scanner purchasing advice: how to choose the right product
- What you need to know
- There are many different types of scanners – handheld scanners, film scanners or the so-called flatbed scanner.
- Meanwhile, scanners are also available wirelessly; with these models the images are transmitted via Bluetooth.
- All scanners require software to be installed on the PC in order to work with the device.
- The most important purchase criteria include resolution, colour depth, tonal range and working speed.
Scanners and their tasks in everyday life
We encounter scanners almost every day. When shopping in the supermarket, we encounter barcode scanners at the checkout. They capture the barcode of the products and thus initiate the actual purchase process. But this is only one example of scanners in everyday life. There are many different devices on the market for various tasks.
The most widespread scanner model is certainly the flatbed scanner. It is ideally suited for all common applications in private use. It can also be a good alternative for smaller offices. However, as soon as you have to scan a lot and often, the flatbed scanner quickly becomes unwieldy. In such a case, it is important that the scanner has an independent feeder and that the individual pages do not have to be inserted by hand. For the most flexible use, a mobile handheld scanner is recommended.
There are many requirements for scanners in everyday life and ways to use them. Functions such as scan-to-cloud or scan-to-PDF are considered standard today. The scan-to-cloud function transmits the scan to the internet and stores it in the cloud. The scan-to-PDF function captures a document and saves it as a PDF file.
What is a scanner?
The term “colour scanner” or “scanner” for short essentially refers to a device that scans and electronically captures documents. These scanned documents are then stored on a connected PC. The process of electronically scanning is referred to as the eponymous “scanning” of the document. The result is called a “scan”. Scanning is similar to a copying process. However, the copy does not come out of the device in paper form, but is provided digitally on the terminal device connected to the scanner. In most cases, you operate the scanner manually using the controls provided; some models can also be controlled via an app.
How does a scanner work?
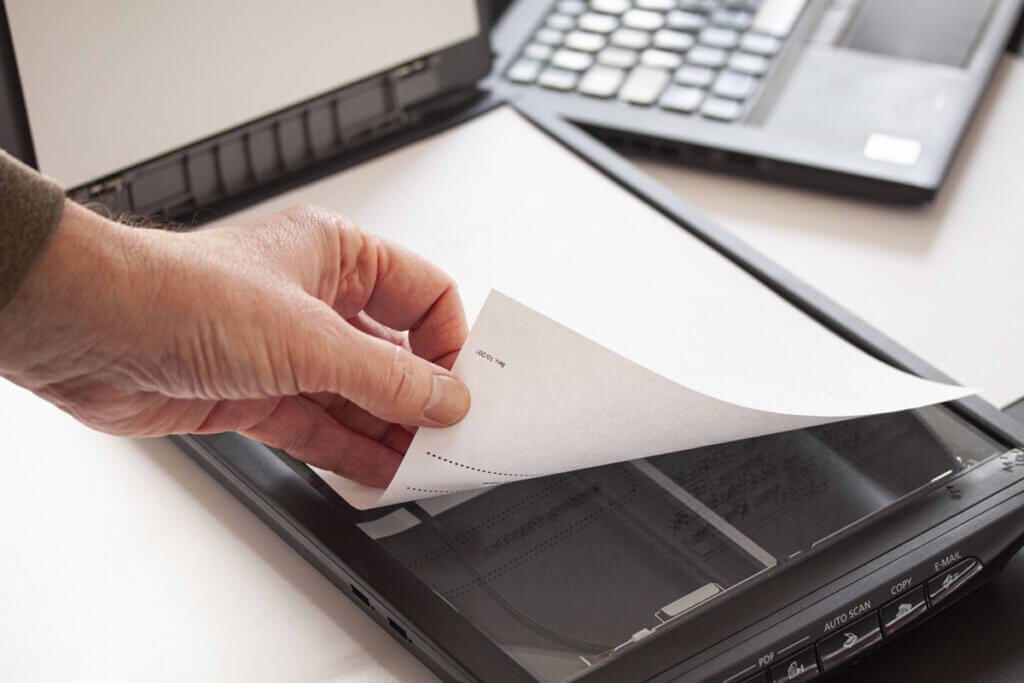
Most devices are connected to a PC or laptop with a USB cable. On the computer, you need to install the appropriate driver software to ensure that the two devices communicate with each other correctly. You can either download the driver from the internet or use the CD that some manufacturers include with their products. These CDs also contain the software that is intended for use with the colour scanner. When everything is installed, you can try a first scan. Place a document on the glass surface of the scanner and start the process as soon as the cover is closed. On some machines there is a button for this, on others the scan is started on the PC in the associated programme. If everything is installed correctly, you can now hear the colour scanner working.
It systematically scans the document and digitises it. The speed of the process can vary depending on the quality level set, but also on the device. When the scan is complete, a preview is displayed on the computer. This makes it immediately clear whether anything has slipped and you should repeat the scanning process again. If everything is correct, the file can be saved on the hard disk. Some devices offer the option of transferring the file to a cloud or sending it directly by email. However, the file must not be too large for sending by email. Depending on the quality of the scan, such a file can quickly take up a lot of storage space.
Who needs a scanner?
Especially people who regularly work with photos and documents very often need to use a scanner. Colour scanners are used to digitise documents or pictures. These can then be saved or further processed on the PC. Old photos or extensive document files can be conveniently scanned; in this way, they are permanently available so that you can view them at any time.
The advantages of a scanner in detail
- A colour scanner is easy to use.
- It makes it easy to digitise and store images and text.
- Depending on the model, the scanner can also capture slides or photo negatives.
- Many scanners allow direct forwarding by email or store the scan in a cloud.
- Simple colour scanners are usually very inexpensive.
The different scanner models
Choosing the right scanner depends on the main purpose and the type of documents you want to scan. In addition, the available space is crucial. Comprehensive devices with multiple functions take up more space than simple hand-held scanners.
Do you prefer a stand-alone scanner or a multifunctional device?
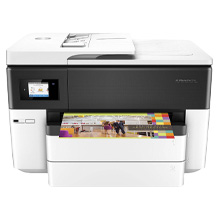
Some devices can only scan, while others have multiple functions. With a multifunction device, you can print, copy, scan and often fax. Combining these functions in one machine saves space, and is especially useful if you have limited space. However, because multifunction devices combine several functions, their functionality is interdependent. If one of the functions is defective, the other functions often fail as well. Repair or purchase of a new device may be the result. Stand-alone scanners are the better alternative here; their technology is usually less susceptible to malfunctions. In addition, the purchase of a new scanner is often much cheaper compared to multifunctional devices.
3D to 2D
With a 3D scanner you can scan and digitise three-dimensional objects. You place the object on a rotating surface and let the device “read” all sides of the object. The three-dimensional scan is then transferred to your PC so that you can view a digital representation of the object.
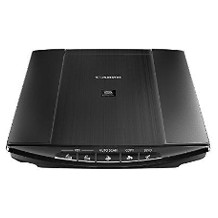
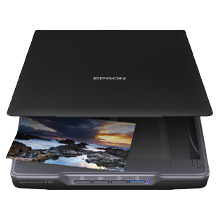
Flatbed scanner
The flatbed scanner is the best known model. It is widely used in the private sector, offers high-quality scanning results and is usually relatively cheap to buy. According to its name, it is a very flat device with a glass surface. The original is placed on this surface for scanning; since the scanners do not have a feeder, you have to insert the documents by hand.
During the scanning process, the original is scanned and digitised line by line with a fluorescent lamp. This mode of operation is typical for an LED colour scanner. The highest resolution of the most modern flatbed scanners is around 4,800 dots per inch. On some models it can be even higher. The scan quality is sufficient for most private applications in any case.
Pro points
- High scan resolution
- Ideal for private use
- Suitable for text documents, photos and slides
- Good value for money
Drawbacks
- No automatic document feeder
- Takes up space
Hand scanner
Mobile scanners such as the hand scanner are always used when there is no fixed location for scanning. The bar-shaped devices are pulled by hand over the document to be digitised. In doing so, you have to move them very smoothly, slowly and without lateral deviations over the paper. This also makes a scan by hand scanner prone to errors. Some practice is definitely required for correct use and good results.
For texts, handheld scanners are a good choice. However, with very large documents, you may have to move the device across the page several times because of the narrow width. You can then assemble the individual scans into one page in an editing programme. This procedure makes the application comparatively cumbersome. For regular scanning of larger pages, handheld scanners are thus less suitable than other models.
The models run on a rechargeable battery or batteries. The scanned data is then transferred via Bluetooth or alternatively stored on an SD card located in the device. Today, the type of “handheld scanner” is mostly found under the designation “mobile document scanner” and is most common in the business sector.
Pro points
- Space-saving
- Ideal for mobile use
- Very cheap
Drawbacks
- Scanning inaccuracies possible
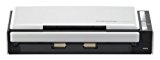
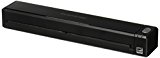
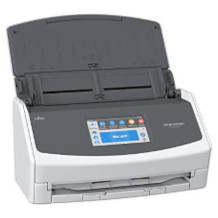
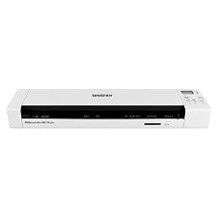
Document scanner
The feeder scanner is similar in design to a fax machine. It specialises in scanning multiple documents. Therefore, it is mainly used in offices with a high scanning demand. The other functions of the document scanner are rather limited. The biggest plus point is its high speed at which it scans several documents one after the other. The pages are pulled past the scanning glass and digitised in the process. A higher-quality form of the document scanner is the document scanner. The document scanner offers the additional function of duplex scanning, with which both sides of a document printed on both sides are digitised in one pass.
Pro points
- High resolution scans
- High working speed
- Space-saving design
Drawbacks
- Only for single text pages
- High price
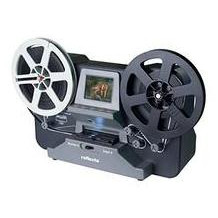
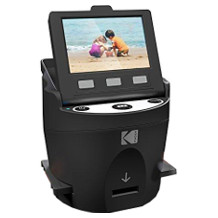
Photo and film scanners
This type of scanner is perfect if you want to digitise photos, negatives or slides. The scan resolution should be at least 4,000 dots per inch to deliver a good result. This means that the resolution of a photo scanner is also significantly higher than the values of the familiar flatbed scanner. There are photo scanners and also pure slide scanners. Some photo scanners have an automatic feeder and can therefore process whole stacks of pictures up to a size of about 10 x 15 centimetres. Slide scanners, on the other hand, have a device for scanning individual slides as well as entire film strips. Particularly high-quality slide scanners digitise each image from the photo strip individually and save it. However, they are also somewhat more expensive. The film scanner is always used when old photo or film negatives need to be digitised.
Pro points
- Very high scanning resolution
- Suitable for photos and printed images
- Very space-saving
Drawbacks
- Only for scanning photos and images
- High price
What should be considered when buying a scanner?
When buying a scanner, the most important thing is the technical details. The resolution, the colouring as well as the scanning speed are decisive for good results. Furthermore, the device should be compatible with your PC or laptop. In the best case, the scanner should even have Bluetooth so that you can use it without a cable.
The technical details
In the first place, the technical facts of the device are definitely important. These include the resolution, which is specified in “dots per inch”, the colour depth, the tonal range, the image sharpness, the original format, the display size, the character recognition software and the operating speed of the scanner. Any image processing software included with the scanner may also be relevant when making a purchase.
Resolution
A first basic comparison can be made by looking at the resolution of the different scanners. The abbreviation dpi stands for “dots per inch”. It provides information about how good the scan result will look later. The higher the value, the better the result. If, for example, a photo is to be digitised in high resolution and later printed again, then a high dpi value is important in order to avoid blurred results.
Colour depth
The colour depth plays a role in the conversion of the source document into a file. It is important that the colour looks as true and rich as possible despite the exposure. The colour depth is given in bits and is usually between 24 and 48 bits. The higher it is, the more colour information the scanner can store for each pixel. However, the colour depth does not tell us anything about whether the scanner can represent the colours at all.
Tonal range
between the lightest and darkest areas. The tonal range thus provides information about the grey levels of a scanner. It is important to use the tonal range optimally in order to be able to reproduce an image 1:1. Only then can convincing results be achieved in contrast and colour. The tonal range is particularly important for scanning text in order to reproduce all details precisely and legibly.
Speed
The operating speed of a scanner is crucial for most applications. Especially when a lot of scanning is to be done, it is important how long the colour scanner needs for this. The higher the workload, the faster the scanner should work. The scanning speed is given in images per minute (IPM). Single-feed scanners often score with a high speed and can digitise at least ten pages in one minute. Particularly fast models achieve a speed of 0.5 seconds per A4 page.
Scan area
The scan area determines which formats the scanner can work with. With many scanners for private use, the largest possible paper format is DIN A4 with the dimensions 21.0 x 29.7 centimetres. Models with a larger scanning area are also suitable for A3 pages measuring 29.7 x 40.0 centimetres. Documents can always be smaller than the scan area. However, you must then make sure that they are inserted as straight as possible. Scanners that automatically straighten image objects are practical. You often have to select the corresponding function in the settings.
How are scanners connected to the PC?
The scanner’s connectivity and ports are another important purchase criterion. As a rule, the scanner is connected to the computer via a USB port. High-quality devices are also Bluetooth-enabled or can be integrated into a local home network via WLAN. This means you are not dependent on cables for scanning.
Features and operation
The range of functions of the colour scanner determines its possible uses. If you want to scan more than just individual documents, you need sufficient resolution for photos or an automatic feeder for a whole stack of papers. Many scanners are controlled directly via software on the PC or alternatively via an app. Most models also have a manual scan button directly on the device. Especially with flatbed scanners, you should make sure that the cover hinges are well made. They should be flexible to operate so that you can also scan thicker originals.
Scope of delivery
The scope of delivery usually includes nothing more than the scanner and the power cable. Some models also come with a USB cable and a driver CD. Optionally, the cable can also be purchased separately. Most manufacturers make the driver software available for download on the Internet.
Design
Colour scanners look very similar, just like printers. However, there can be differences. Ideally, the design should match the desk and the location of the scanner. For example, if the scanner is placed against a wall, the feed or support surface and any output area should face forward. In terms of colour, most scanners are plain black, white or grey.
Tips for installing the colour scanner
The installation of the colour scanner works mostly automatically with modern devices. Connect the scanner to the PC and start the installation of the driver there. In most cases, the PC already recognises the connected device and starts the installation automatically. If you are unsure, you can proceed according to the following steps:
- Switch on the scanner and connect it to the computer – either via USB or WLAN.
- Wait and see if the PC recognises the colour scanner on its own.
- If the computer recognises the scanner, it will automatically search for the required driver software and install it.
- Alternatively, you can search for and download current drivers for the scanner on the Internet. Usually, a download of the current driver is available on the manufacturer’s website.
- Now the colour scanner is ready for use.
What should I do if the PC cannot find the scanner?
With multifunction devices, there can sometimes be minor problems recognising the scanner in the device. If this is the case, the installation only requires a few additional steps:
- First, check that the devices are connected correctly. The cables themselves should also be checked to rule out possible damage.
- Now open the Windows Control Panel and select the option “Devices and Printers”. Here you can check which driver has been installed and if there is a newer version.
- For the check, the device is searched for in the so-called “Device Manager” and the driver is updated under “Properties”.
- In the menu “Devices and Printers” you should now see the note “Ready” below the device name.
Cleaning and maintaining the colour scanner
Regardless of the model, every colour scanner needs to be cleaned or serviced at some point. Otherwise, dirt and dust on the surface will lead to losses in terms of the quality of the scanning result. As a rule, the effort required here is very low. First switch off the scanner for cleaning to avoid short circuits. Then it can be cleaned carefully.
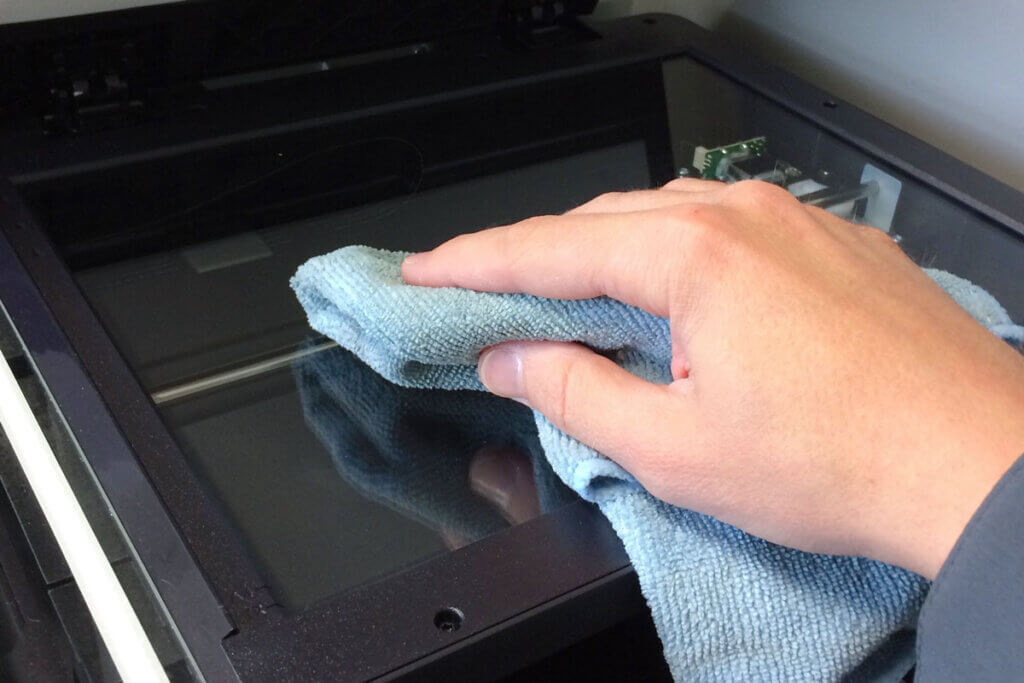
Make sure that no moisture gets into the machine. Special care must be taken with the scanning glass. Scratches on it must be avoided at all costs, as they have a negative effect on the scanning result. Therefore, wipe the glass gently with a soft microfibre cloth. Dirt in the corners and grooves of the scanner is best removed with an air-pressure spray or a cotton swab. For stubborn dirt on the scanner surface, you can lightly moisten the cloth. In addition, the following points should be considered when cleaning the scanner:
- Do not apply too much pressure to the scanner glass.
- Do not use alcohol, thinner or other solvents for cleaning.
- No liquid should get into or onto the scanner.
- The housing of the scanner should not be opened.
Image 1: © Ole / stock.adobe.com | Image 2: © grosche.nrw / stock.adobe.com